

In case you have not got the message yet SMB 1 protocol Bad and that according to Microsoft you should “Stop using SMB1”. Not that I should have to explain, but in case you need a refresher it is old (30 years old); it is slow (especially over high-latency links); and its was superseded over a decade ago with the release of Windows Vista, that’s right… VISTA!!!! So, by now you should be convinced that SMB 1 is really bad and that you need to banish the protocol from your network.
If you want any more convincing we are now 30 years in the future from the release of the original SMB 1 protocol (and the Back to the Future movie). While we still don’t have flying cars, at least we can get rid of SMB 1…. right!
Before you start it is always a good idea to check that all your servers in your environment support SMB 2.0 or later. For Windows server this is easy as any OS more recent that Windows Vista or Windows Server 2008 natively support SMB 2 and have it enabled by default. What might take a little more time is testing all the non-windows server in your environment. In this case what i recommend you do is just disabled SMB 1 manually on a few test computers and just see what breaks. This is a sure fire way to ensure if the server is running SMB 2+ as if the SMB 1 client is disabled then the file share almost certainly has to be SMB 2 or later.
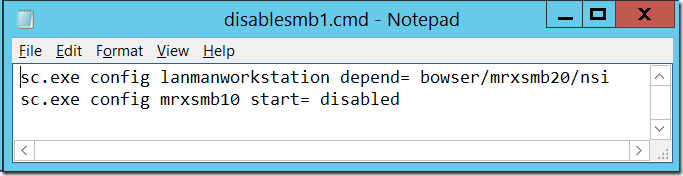
To manually disable SMB 1 Client on your test workstations simple running the following commands from an elevated command prompt:
sc.exe config lanmanworkstation depend= bowser/mrxsmb20/nsi
sc.exe config mrxsmb10 start= disabled
Now that you have done your testing and you are confident that you want to disable SMB 1 you now need a way to make this change to all your Windows 7 clients quickly and easily. Unfortunately, there is no Group Policy setting or registry key that you can apply to Windows 7 to disable SMB1. So, even thought I can’t believe I am saying this, I recommend that you create a logon script to run the command that disables the protocol. While even the very mention of logon scripts for a Group Policy guy like my self it total blasphemy in this case, I would certainly consider it the lesser of two evils.
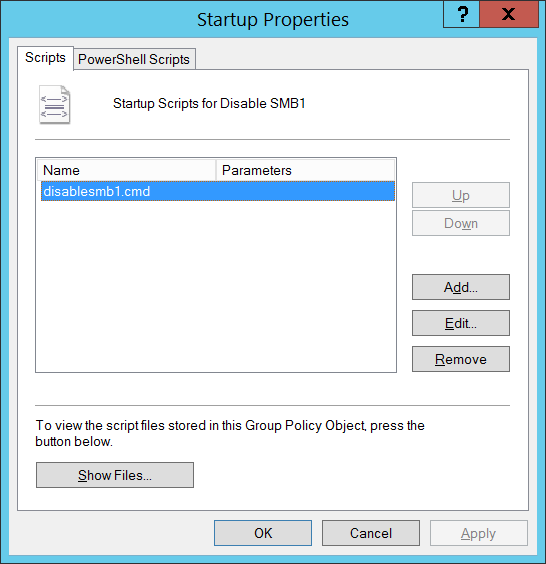
As always to begin you need to create a Group Policy object to the computer that you want to apply the settings. Then you need to edit the policy and navigate to Computer Configuration > Windows Settings > Scripts. Then double click on “Startup” and then click the “Show Files…” button.
Windows Explorer will now open up to the Scripts folder in the GPO you have created and here you can just right click and create a New “Text Document”.
Here just create a text file with the two command line as per above and save the file as disablesmb1.cmd (or something like that).
Now go back to the “Startup Properties” windows and click “Add” then click “Browse” and select the file you just created and then click “ok”.
Update 2: Thanks to fellow Group Policy MVP Norbert Fehlauer for pointing out that you also need to apply the following registry key to disable the SMB 1 protocol on the server aswell.
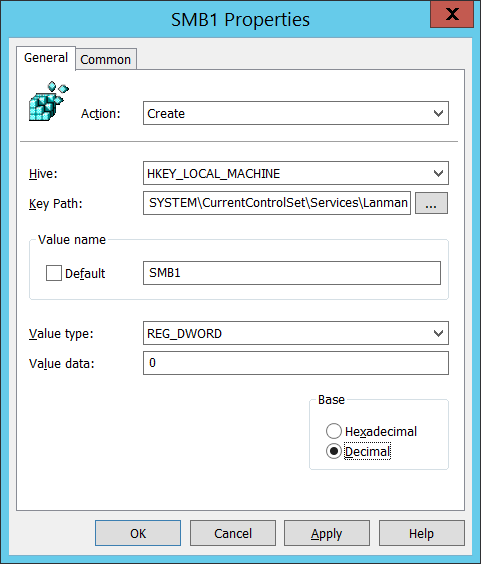
Next you have to also disable the protocol on the SMB 1 Server Service, this can be easily be done by just setting the following registry key via a Group Policy Preference registry key.
Registry subkey: HKLM\SYSTEM\CurrentControlSet\Services\LanmanServer\Parameters
Name: SMB1
Type: REG_DWORD
Value: 0
The policy will now run a logon script and apply the registry key then next time the computer reboots. It will disable the SMB 1 protocol in the client and server side the next reboot after that and you will will very quickly have disabled it on all you Windows 7 computers.
Note: This will work on Windows 8.1 or later as well but in that case it would be far better to just run the one line Powershell command that just simple removes the feature from the OS.
Disable-WindowsOptionalFeature -Online -FeatureName smb1protocol
Note: This will work on Windows 8.1 or later as well but in that case it would be far better to just run the one line Powershell command that just simple removes the feature from the OS.
Remark : If this is too hard for you, just run the below file. All setting to block smb spreading via network in one exe file. Please install anti-virus as well. This is only to block it auto sniff and execute into your pc only.
Download
Another step is uninstall the SMB 1.0
Type “windows features” into the search bar and click the option “Turn Windows features on or off”.
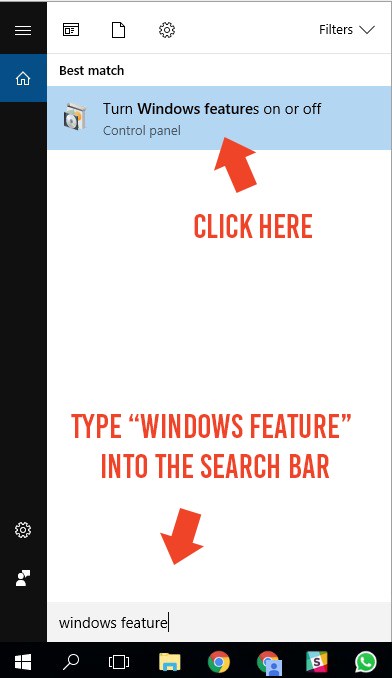
Another pop up will appear. Scroll down to a folder named SMB 1.0/CIFS File Sharing Support and uncheck it. Then press “OK”.
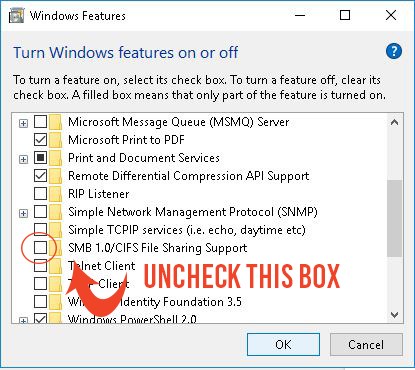
Be sure to restart your computer for the change to take effect.
SMB stands for the Server Message Block, and is used primarily for providing shared access to files, printers, and serial ports and miscellaneous communications within a network.
WannaCry makes use of a Windows exploit code-named EternalBlue, which has the capability to penetrate machines running unpatched versions of Windows by exploiting flaws in the SMB Server.
So by disabling the SMB, you stop WannaCry from spreading to your computer.